
Wiki & Guides
Valheim
Survival · Viking · Iron Gate Studio · Coffee Stain Publishing
Installing Valheim Mods (BepInEx & ValheimPlus)
Install Valheim mods from Thunderstore directly in the RespawnHost panel: automatic dependencies and BepInEx, updates, removal and compatibility guidance.
Last updated September 9, 2026 · RespawnHost
On this page
Installing Valheim mods
In the RespawnHost panel, install Valheim mods directly under Mods from the Thunderstore catalog. BepInEx and required dependencies are set up automatically. Your world and existing configuration are preserved. Special packages can still be installed manually through the file manager or SFTP.
How do I install Thunderstore mods in the panel?
- Create a backup and stop the server.
- Open Mods. The Thunderstore search appears directly, with no platform selection.
- Find and open the mod. Check the version, its dependencies and the author’s compatibility notes for the current Valheim release.
- Click Install. The panel downloads the mod and its dependencies. On a Vanilla server it sets up BepInEx without reinstalling the server.
- Start the server. BepInEx and the loaded mod should appear in the console.
Under Installed, you can manage mods and available updates. Stop the server before updating or removing mods too. A dependency cannot be removed while another installed mod still requires it. Configuration files are kept when removing a mod; remove unused libraries separately.
Check compatibility
Packages marked as client-only or tools, plus known desktop mod managers, are hidden from the catalog. These labels come from Thunderstore and do not replace compatibility testing. Mods may need updates after a new Valheim release. Packages requiring a custom installation script or conflicting dependency versions are not installed automatically.
Important: server, client or both?
Before you start — not every mod belongs on the server:
- Client only (UI, graphics, minimap mods): run locally in each player’s game, do nothing on the server.
- Server only (e.g. backup/server logic): server only, apply automatically for everyone.
- Both (most gameplay mods): must be installed on the server and on every player.
Warning
Valheim does not sync mods automatically. All players need the same mods — for mods with enforced version checks even the same version, otherwise you get kicked on join. Whether a mod is server-/client-side and whether it enforces versions is stated on its Thunderstore page.
Shortcut: BepInEx or ValheimPlus via the marketplace
Under Mods → Templates, you can still choose Vanilla, BepInEx or Valheim Plus as a template. Switching templates resets the server files. Keep the backup enabled if you want to preserve your world. Regular Thunderstore mod installation does not require this template switch.
For ValheimPlus (V+) the [V+] Version startup variable then controls which version is loaded: latest or a fixed version number, restart the server, done.
ValheimPlus settings (stamina, building, inventory, rates, map sharing …) live in BepInEx/config/valheim_plus.cfg. The file is created on the first server start with Valheim Plus. You don’t have to edit it by hand: under Configuration in the panel you’ll find all 61 sections with every value, an explanation and a “section enabled” toggle per section — change, save, restart the server. Important: a section only takes effect if its enabled is set to true.
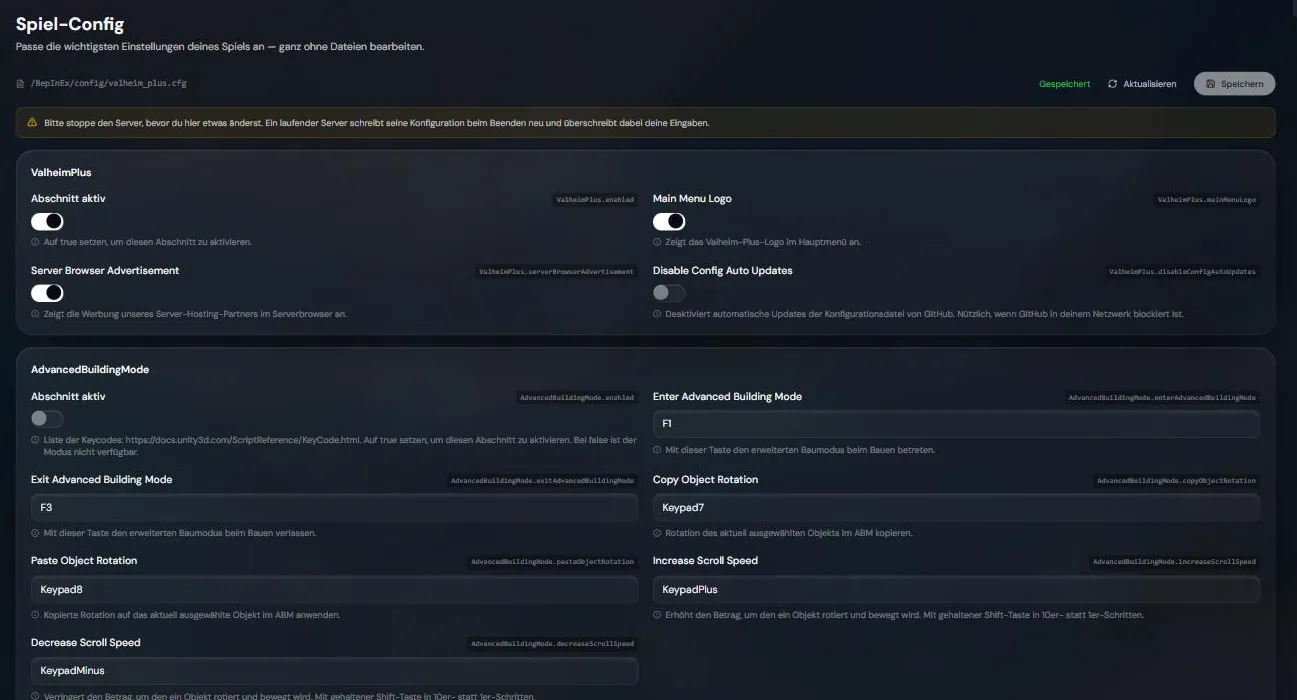
valheim_plus.cfg under "Game Config" — every section has a "section enabled" toggle, every value an explanationNote
ValheimPlus still needs to be installed on every player too (same version). The original project valheimPlus/ValheimPlus is no longer actively maintained — the current continuation is the fork Grantapher/ValheimPlus.
Installing BepInEx mods manually
For packages you want to manage manually, you also need BepInEx:
- Download BepInExPack Valheim (namespace
denikson) from Thunderstore. - Extract the archive. Upload the contents of the
BepInExPack_Valheimfolder (not the folder itself) via the RespawnHost panel file manager (or SFTP) into your server’s root directory — i.e. theBepInEx/folder,doorstop_config.iniandstart_server_bepinex.sh. - Upload your mod
.dllfiles intoBepInEx/plugins/. Their config files land automatically inBepInEx/config/. - Restart the server. The log should show “BepInEx” bootstrap messages.
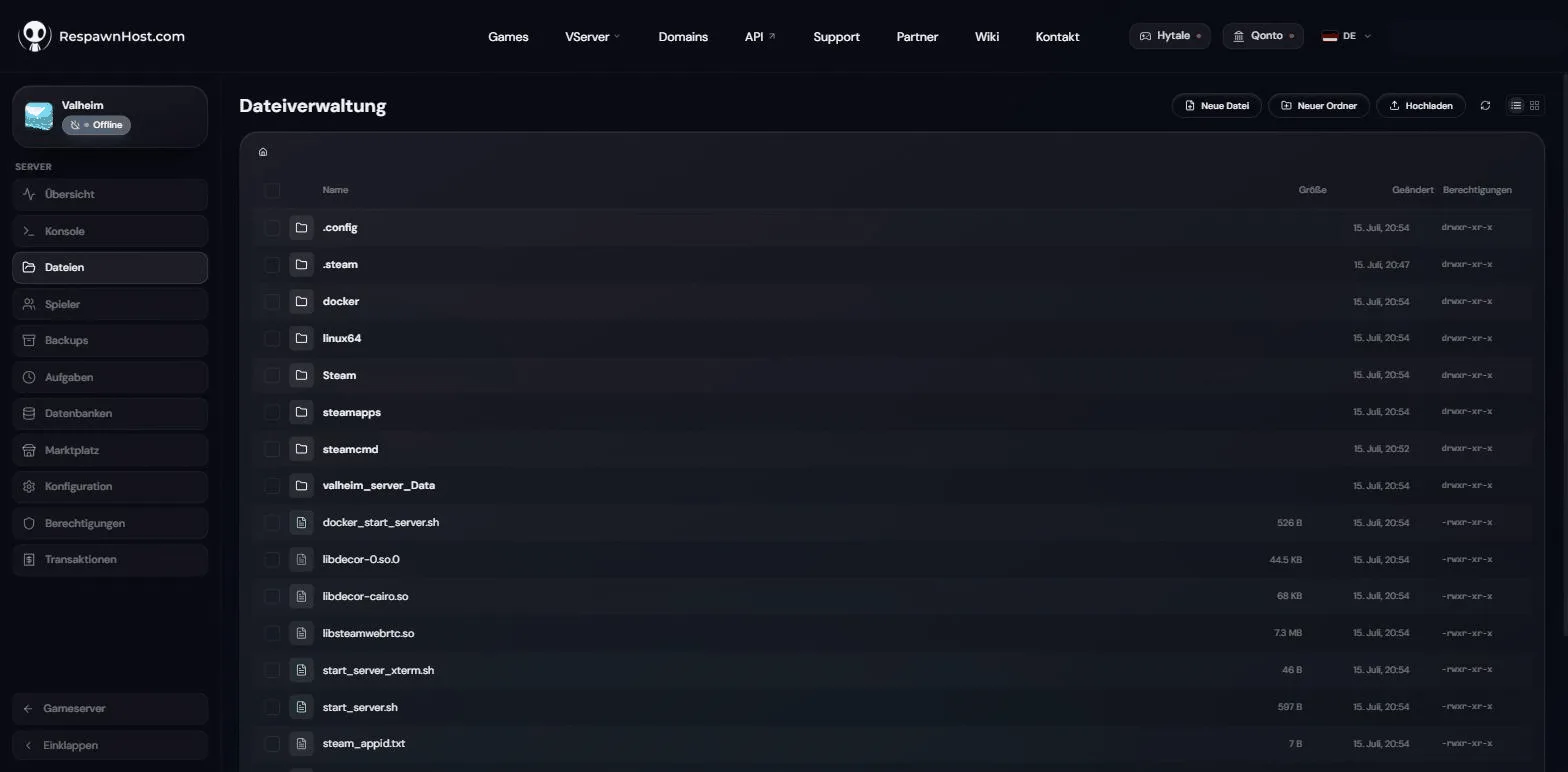
start_server.sh — extract the BepInEx package here; plugins then go into BepInEx/plugins/Tip
To manage your mod collection, the local manager r2modman (or Thunderstore Mod Manager) is worth it: it resolves dependencies automatically. Upload the resulting plugins to BepInEx/plugins/ on the server.
Removing a mod
Remove panel-installed mods under Mods → Installed while the server is stopped. Manage manually uploaded mods through the file manager: back up the relevant files, remove them from BepInEx/plugins/, then start the server again.
FAQ
Why does nothing happen after installing? Most likely it’s a client-only mod — it only affects the player’s game, not the server. Check the Thunderstore page for whether the mod is server-side.
Do my fellow players need to install the mods too? For “both” and client mods, yes — everyone needs the same mod version. Server-only mods run on the server alone.
Do mods survive a game update? Your files stay in place. After big Valheim updates a mod can become incompatible — then grab an updated version. With auto-update enabled you may need to wait briefly for mods to catch up.
Related guides
- Renting & setting up a server
- Configuring your server — startup variables & world modifiers
- How much RAM do I need? — mods need more RAM
No server yet? Rent a Valheim server.
Your own Valheim server?
At 3 hours a day that is about €2.27 a month. Billed by the second: server off, costs off.
- No subscription, no minimum term
- Balance does not expire while your account exists
- Online in under 90 seconds