Wiki & Guides
Vintage Story
Survival · Sandbox · Anego Studios
Renting and Setting Up a Vintage Story Server
Rent a Vintage Story server and set it up in minutes: pick a package, configure the server (serverconfig.json), connect — plus RAM recommendations by player count.
Last updated September 9, 2026 · RespawnHost
On this page
Vintage Story server: surviving the wilderness together
Vintage Story is arguably the deepest survival sandbox of its kind — and with your own server you explore the world together, with a persistent 24/7 world. Good to know: Vintage Story is not on Steam — you buy the game directly at vintagestory.at; you don’t need an extra copy for your RespawnHost server.
How much RAM does a Vintage Story server need?
The official rule of thumb: 1 GB base + ~300 MB per player. In practice:
| Setup | Recommendation |
|---|---|
| 2–4 players, vanilla | 2–4 GB RAM |
| 5–10 players | 4–6 GB RAM |
| Modded / large worlds | 8 GB RAM+ |
An SSD is practically mandatory since recent versions — NVMe storage is standard at RespawnHost.
Step 1: Order your server
- Open the Vintage Story order page (or via respawnhost.com/en/vintage-story-server-hosting).
- Choose prepaid plan or Pay-Per-Use, location Frankfurt, Salt Lake City and Charlotte or Noida.
- Complete the order — the server is ready in under 90 seconds.
Step 2: Configure
The most important options are set directly via the startup variables in the panel: Max Clients (default: 16), release branch (stable/unstable) and release version.
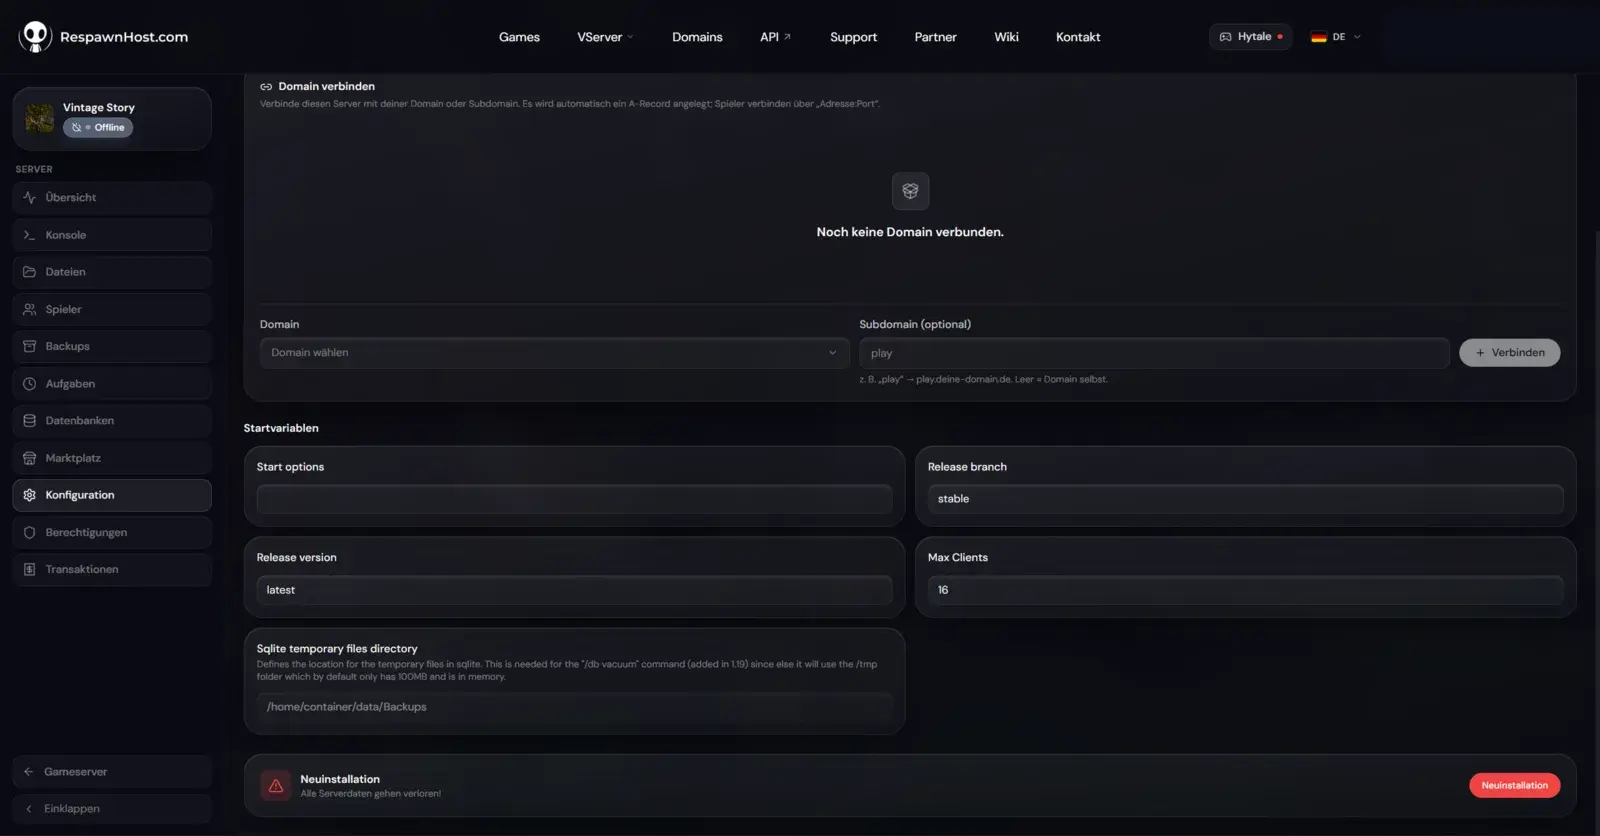
Everything else (server name, description, password, whitelist) lives in serverconfig.json in the server’s data/ directory — accessible via the panel’s file manager. Worlds/saves sit next to it under data/Saves/.
Note
The serverconfig.json is generated automatically on the first server start — right after ordering, the folder is still empty. Start once, then edit.
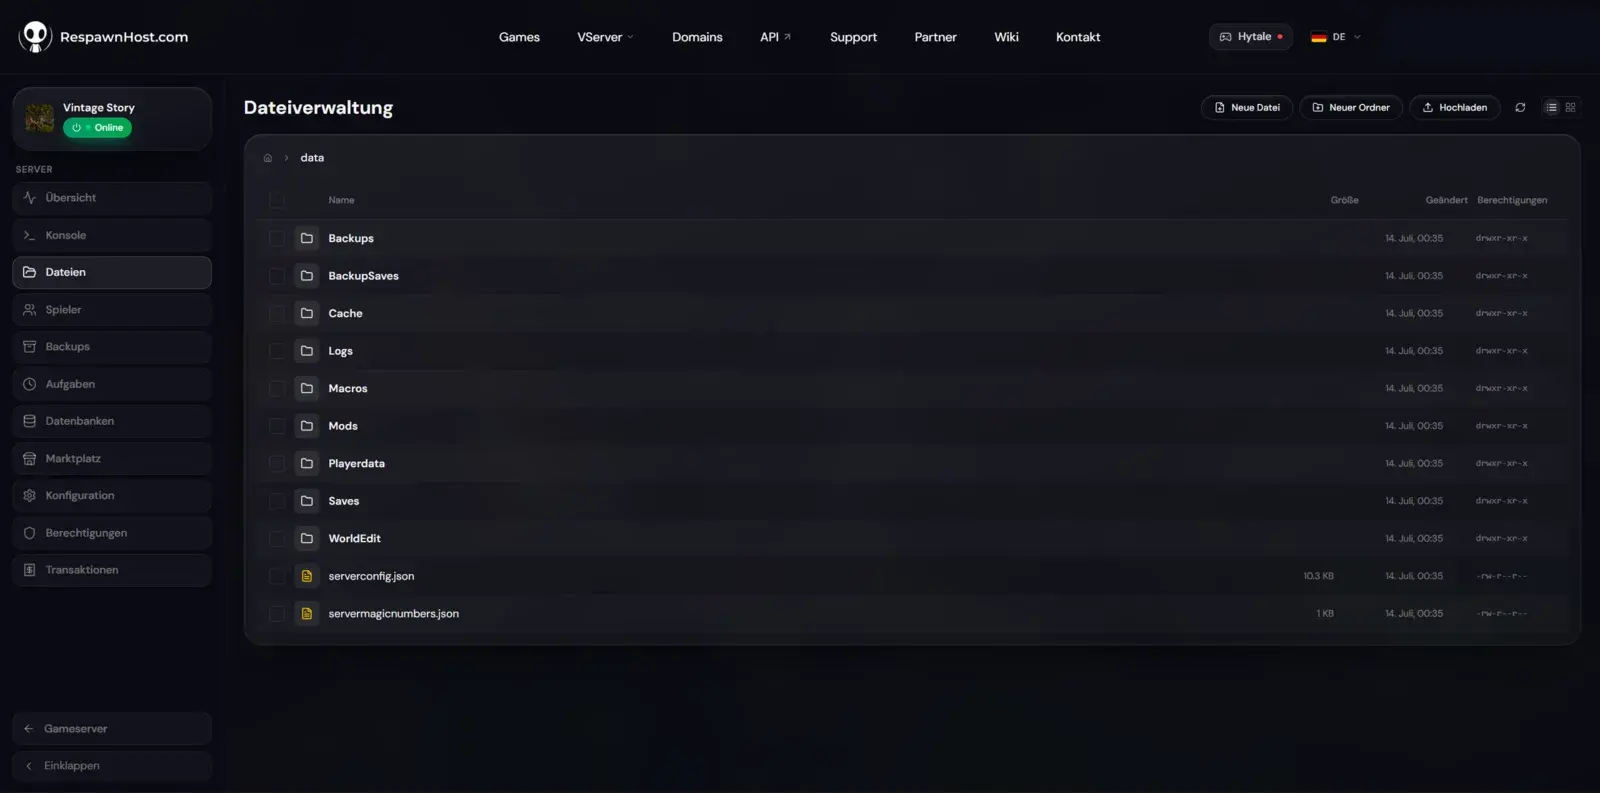
data/ directory: serverconfig.json, Saves/ and Mods/Note
Vintage Story uses port 42420 (TCP + UDP) by default — at RespawnHost this is already set up, nothing to open.
Step 3: Connect
In-game: Multiplayer → Add server → enter IP:port from the panel. Done — there’s no forced central server browser, you connect directly.
Installing mods
Vintage Story has an active mod scene (mods.vintagestory.at). Drop server mods (.zip) into the data directory’s Mods/ folder via the file manager and restart the server. Content mods must also be installed client-side by all players.
Tip
Become admin via the server console in the panel with /op YourPlayerName — after that you can use all commands directly in-game.
FAQ
Do I need the game on the server? No — the dedicated server is freely available and pre-installed at RespawnHost. Only your players each need a game license from vintagestory.at.
Is Vintage Story on Steam? No, deliberately not — purchases go directly through the developer Anego Studios (vintagestory.at).
How do I back up my world?
Via panel backups or the file manager/SFTP: download the entire data directory (especially Saves/ and serverconfig.json) — ideally with the server stopped.
Ready? Rent a Vintage Story server — online in under 90 seconds.
Your own Vintage Story server?
At 3 hours a day that is about €2.37 a month. Billed by the second: server off, costs off.
- No subscription, no minimum term
- Balance does not expire while your account exists
- Online in under 90 seconds