

Wiki & Guides
Windrose
Pirate Survival · Co-op · Kraken Express · Kraken Express, Pocketpair Publishing
Creating and setting up a Windrose server
Step by step: order a Windrose server at RespawnHost, set the basics and connect your crew via invite code.
Last updated July 16, 2026 · RespawnHost
On this page
Creating a Windrose server at RespawnHost
This guide takes you from ordering to your first login on your own Windrose server. The server itself is online in under 90 seconds — the rest takes just a few minutes.
Windrose does not connect players through a public server browser or an IP address — it uses an invite code. That’s the most important difference from many other survival games, so keep it in mind for step 5.
Requirements
- A RespawnHost account — register here
- Credit on your account (prepaid, top up via PayPal or credit card)
- Windrose on Steam (Windows) — the game is currently Windows-only
Step 1: Start your order
- Open the Windrose order page (or go to respawnhost.com/en/windrose-server-hosting and click Get server).
- Log in if you haven’t already.
Step 2: Choose a billing model
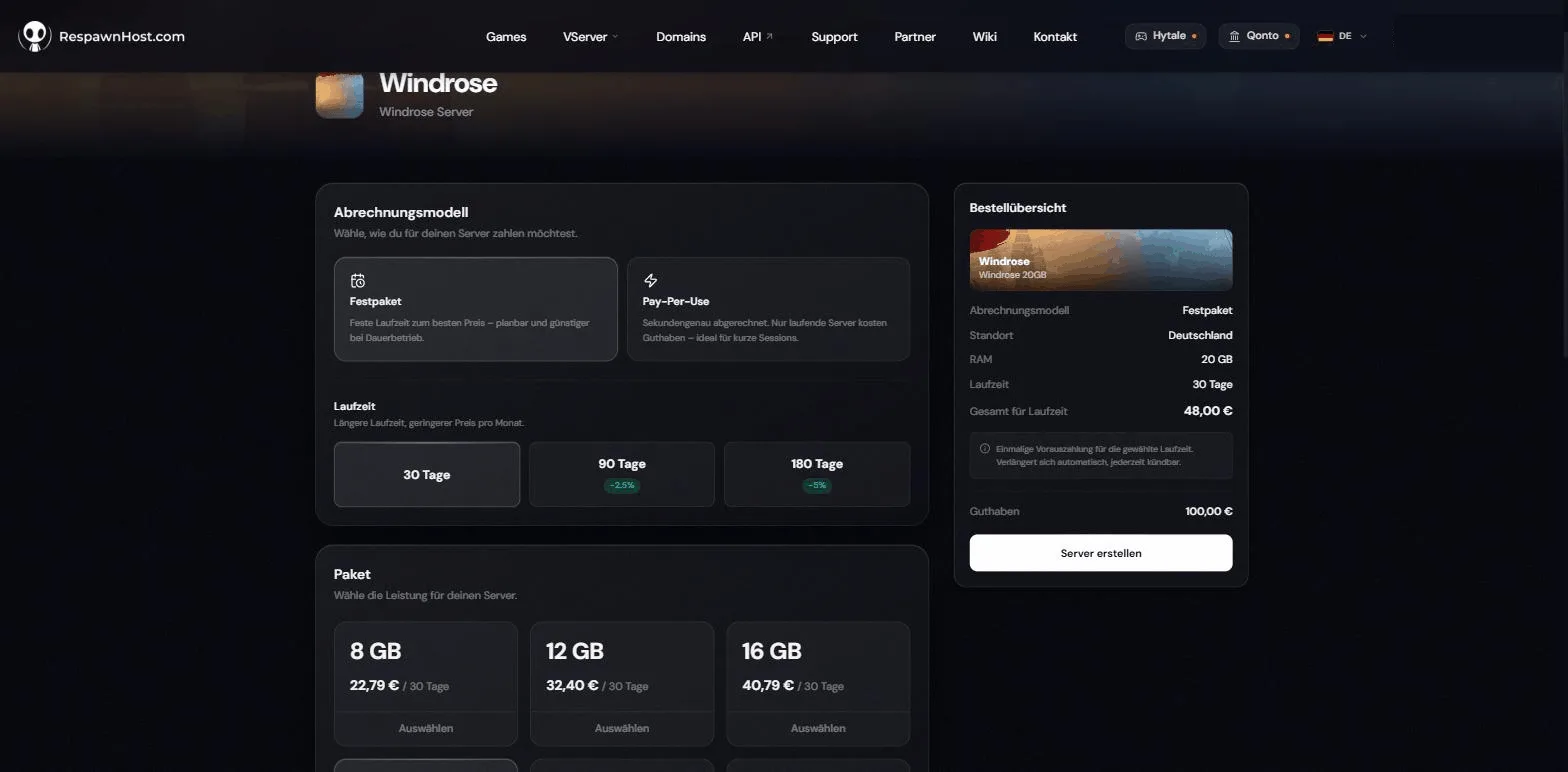
RespawnHost offers two models — you pick at checkout:
| Model | How it works | Best for |
|---|---|---|
| Prepaid plan | A fixed price for a term, paid up front from your balance. | 24/7 operation, communities |
| Pay-Per-Use | Billed by the second — you only pay while the server is running. Server off = no cost. | Weekend crews, casual sessions |
Because Windrose crews rarely sail every day, Pay-Per-Use is the cheaper choice for most groups.
Step 3: Choose package and location
- Package: Pick by crew size. Windrose supports a maximum of 8 players per world (the developers recommend up to 4 for optimal performance). Most crews are fine with 8–12 GB of RAM. Details in Which Windrose package is right for me?
- Location: Germany (Frankfurt) for Europe or USA for North America. Choose the location closest to you and your crew.
Then complete the order — the server is installed automatically and ready to start in under 90 seconds.
Step 4: Set the basics
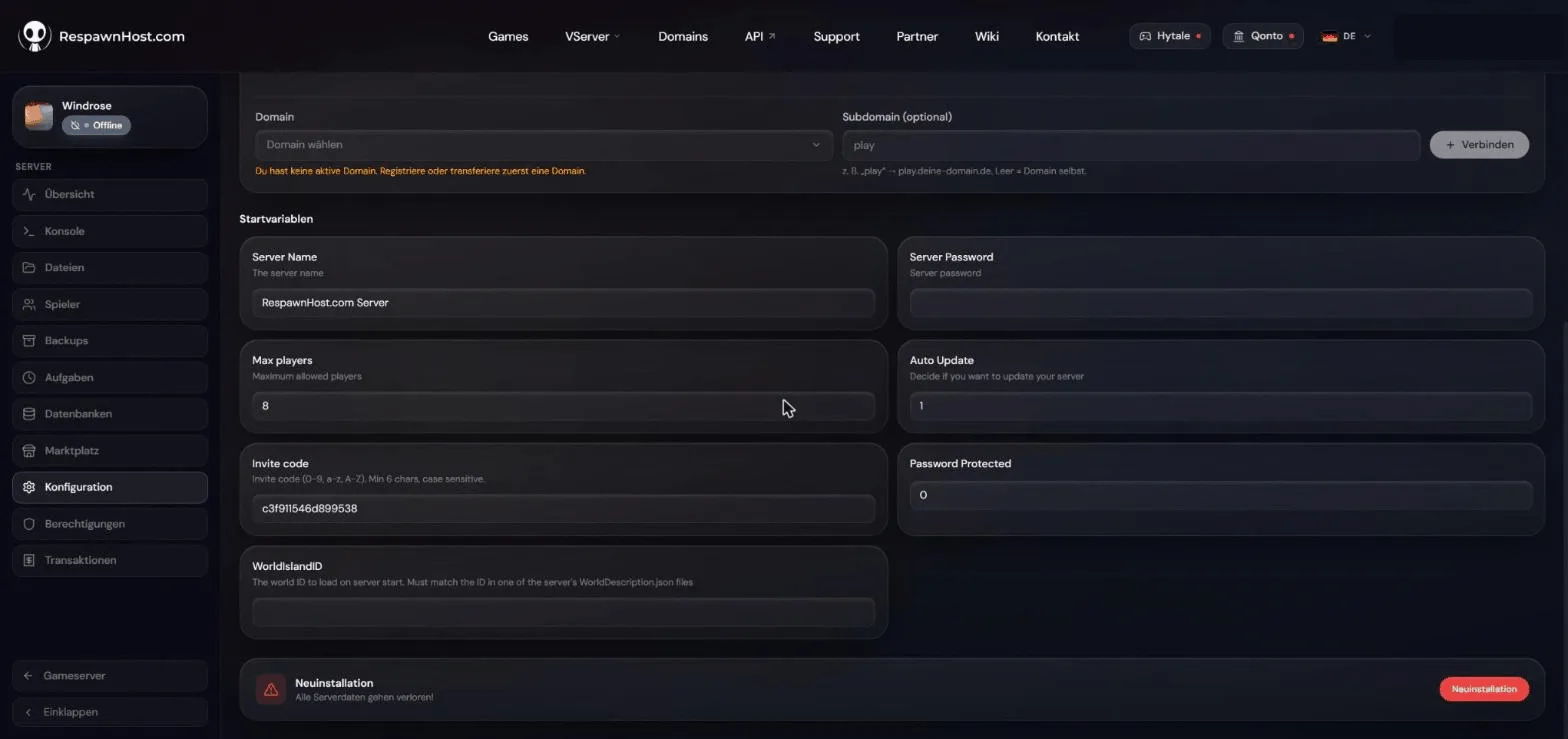
Windrose stores its server settings in a file called ServerDescription.json. At RespawnHost you don’t have to create the file by hand — under Configuration → Startup variables the panel gives you every value as a convenient input field:
| Startup variable | Meaning |
|---|---|
| Server Name | Your server’s name |
| Invite code | The code your crew joins with — at least 6 characters, 0-9 a-z A-Z, case-sensitive |
| Server Password / Password Protected | Optional password protection (set the password + Password Protected to 1) |
| Max players | Maximum player count — up to 8 |
| Auto Update | Update the server automatically on every start (recommended: 1) |
| WorldIslandID | The world loaded on start — must match the ID in a WorldDescription.json |
Note
Changes to server settings only take effect after a server restart. Also never edit the config while the server is running — it may overwrite your changes.
You set all gameplay rules (difficulty, enemy strength, boarding difficulty) separately in WorldDescription.json — see Configuring Windrose server settings.
Step 5: Start the server and connect
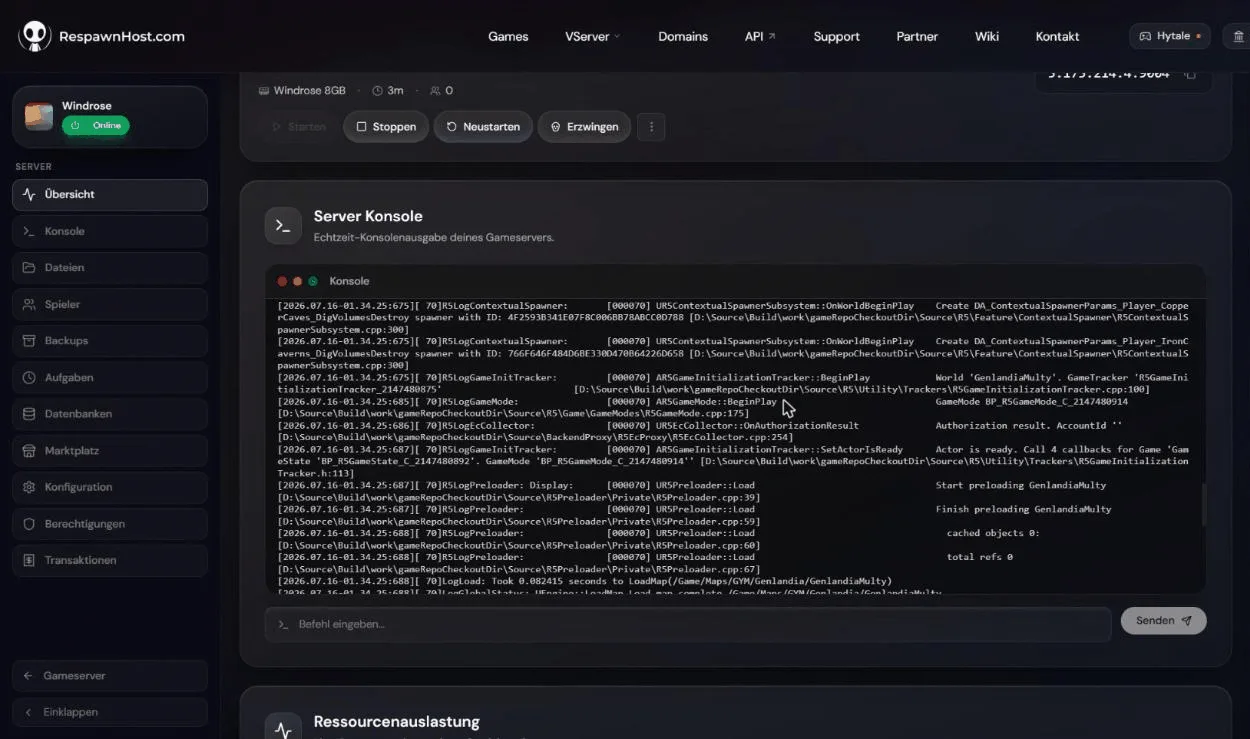
- Click Start in the panel. After a moment the status shows “Online”.
- Launch Windrose and, in the Play menu, choose “Connect to server”.
- Enter your server’s invite code (the one you set in step 4). If a password is set, enter it too.
- The game remembers servers you’ve joined — next time just pick your server from the list.
Tip
Share the invite code (and password, if any) with your crew — that's all anyone needs to join. Windrose has no public server browser, so your server stays private by default.
Admin rights & server management
In the current Early Access build, Windrose has no in-game admin commands and no console. You manage your server entirely through the panel (start/stop, backups, config, logs) and the config files. More on this in Admin commands: what works (and what doesn’t).
Good to know
Note
New Windrose versions are installed automatically on the next server restart. The File Manager in the panel (or SFTP) gives you full access to all server files at any time. Important: server and client versions must match — so restart the server after a game update.
Tip
Set up automatic backups in the panel. Windrose stores the world as a RocksDB database (a whole folder, not a single file) — a backup before any major change is essential.
Next steps
- Co-op & multiplayer explained — how invite codes, hosted worlds and dedicated servers fit together
- Configuring server settings — difficulty and multipliers
- Which package is right for me? — RAM recommendations by crew size
Your own Windrose server?
At 3 hours a day that is about €4.54 a month. Billed by the second: server off, costs off.
- No subscription, no minimum term
- Balance does not expire while your account exists
- Online in under 90 seconds